Thursday 27 February 2014

Recipe 12- Green Apple Salad

Recipe 12- Green Apple Salad 

I have to start off by saying that this salad is AMAZING! 
Everything about it I loved and will more then likely be making this again this week! 
When flipping through the pages of Chef Michaels book everything looks amazing, including the salads. I feel like salads could be the less exciting part of many cook books, but NOT this one! 

I was a little apprehensive in making this salad as I absolutely despise fruit in salad. 
I know I am probably crazy to think that, but I just can't understand the fruit and salad combo. 

But hey, this year was a personal challenge to break out of the comfort zone and try new things, so here we go! 
To start off, I raided my fridge and cupboards for the ingredients. I actually had most on hand which was nice! 

My purchases this week were some cider vinegar & cows creamery extra old cheddar.. which is to DIE FOR! 
Chef Michael starts off the recipe by making "cheese toasts" 
I cut my multigrain baguette and placed the slices onto a baking sheet. I then spread on some olive oil and then my grated my cheese. Using an extra old cheddar cheese was an excellent choice. You really want the cheese flavour to come through on your toasts, it really adds the the salad nicely. 

My toasts went in to the oven for 15 mins, which at first I thought I would have some burnt bread, but it worked out perfect... why do I even doubt you Michael? haha ;)
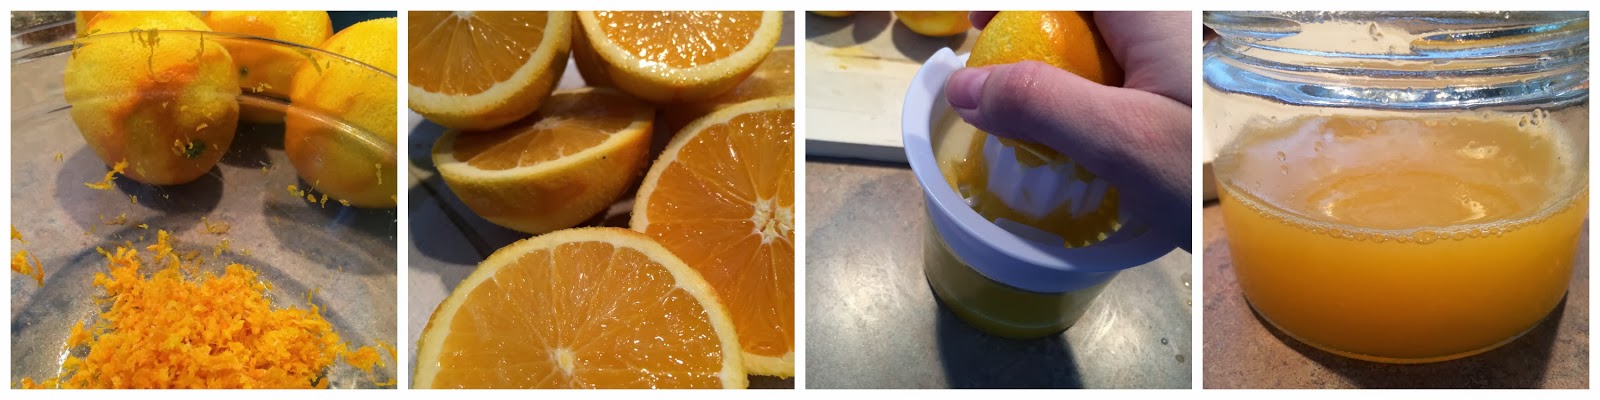
While my toasts were baking away, I started on my dressing. Now Chef Michael says to put all the ingredients into a jar to shake up the dressing... I could not find one for the life of me.
I improvised and used my large glass measuring cup and a whisk.
I added my olive oil, cider vinegar, honey, mustard, salt and pepper.
Now this mix seemed a little odd for me, but it tasted great!
I gave everything a good hard whisk and it came together into a smooth looking dressing.
15 minutes later I had some wonderful smelling cheese toasts.  The smell of these little babies was just divine. I could hardly wait to see how these paired up with the salad. 
I then washed my salad mix and "match sticked" my green apples.
Now here is a technique that I have never used. It took some practice to get the hang of it, but I think they turned out well. And I still have all my fingers ;) 
Next it was just a matter of assembling everything in a large bowl.
In went my apples, salad mix and sunflower seeds.
I then drizzled the dressing over everything.
I also chopped up my cheese toasts into cubes. 
I gave the salad a nice toss and the dressing covered every little bit just beautifully. 
This recipe makes the PERFECT amount of dressing. The salad leaves were perfectly coated and thankfully not dripping in dressing, I don't really enjoy that. 
As the final touch, I added on my cubed cheese toast.

Now I felt the extreme pressure from my mom, husband and kids as I dug my fork in for that first bite.
They all know very well my strange food aversions and mixing fruit with salad was a 'no-no" for me. 
In went the bite.... I was pleasantly surprised how good this tasted. 
The first thought that came to mind was my favourite child hood snack provided by my dear "Grandma Rose". My sister and I always had a snack of cut up apples and cubed cheese at her house growing up.  Still to this day, its a go to snack for myself and kids. This reminded me completely of that beloved snack. 
The cheese compliments the tart green apples and the dressing is so light and fresh that it just makes this salad perfect on the palate. The crunch of the sun flower seeds was also a nice addition.

All in all this salad won me over on the idea of fruit in salad. 
I am really looking forward to making this dish a staple salad in our home. Its so easy, quick and satisfying. 
Later in the evening, I was getting the little ones off to bed and just before I tucked in my oldest daughter she whispered.. "can you send me some of those toast things for lunch tomorrow?" 
Sure enough BOTH kids went to school with a bag of leftover cheese toast cubes in their lunches LOL! 


Hope you all give this one a go! 
As always my compliments to the chef and cheers to you, my friends! 


Monday 24 February 2014

Recipe 11- Mediterranean Fish Stew

Recipe 11- Mediterranean Fish Stew

Arranging the above ingredients for their photo op immediately made me see how colourful this dish would be, not only to the eye, but to the palate. I wasn't sure how all of these bold flavours would come together, but later I found out how well they all worked in one dish.

My adventure on this one started at the seafood counter. Now I have visited it a few times already along my travels, but today was something out of the normal. Chef Michael leaves this one open ended on what type of fish you can use.. 1-2lbs of ANY FRESH SEAFOOD.
Oh dear, where do I begin?
I told the gentleman behind the counter about this blog and recipe and he gave me some suggestions. 
I already knew that I wanted to use some white fish, I chose Haddock. 
Then it was up to me to make up the other pound. The gentleman suggested a frozen lobster tail " that would only require boiling before use".. ok that sounds easy. My choice was the scallops. 
Into my basket went my paper packets and home I went to start cooking. 

Please keep in mind this was WAY out of my comfort zone, I have NEVER cooked a lobster tail OR scallops. EVER. 

My dear friend Craig helped me out by guiding me through the delicate process of cooking seafood. 
He has been trained in one of the best chef schools in Ontario and if anyone could help me, it would be him. He said nothing was worse then overcooked sea food. 
So to start off,  I jumped in with both feet on the lobster tail. 
When I opened up the brown wrapper and saw that creepy alien tail I kind of thought " what the heck did I get myself into?" Craig told me to season my water with 2 bay leafs, some lemon juice, salt and peppercorns. 
In went my lobster tail to its boiling bath for 6 mins. I was amazed that after a few seconds it was already turning the pink colour you expect. And before I knew it, it was ready to come out. 
I am not going to lie, I was wiping the sweat on my brow worrying that this would not cook properly.
After a quick ice bath my tail was done! And my reaction....
HOLY COW I JUST COOKED A LOBSTER TAIL, I SURVIVED..OH MY.. TEXT EVERYONE I KNOW! 
After I pulled myself together from my internal excitement, next was cutting open this thing. 
Google search- " How to cut open a lobster tail" 

Tadaa!! Some kitchen shears and elbow grease got me some wonderful lobster for this dish. I was so pleased with myself for taking this challenge on. It was an exciting feat! 
Next up was the ACTUAL recipe. 
Chef Michael says in his recipe, that the fish will cook fast once it hits that hot broth of the stew. I figured it would be best to prep everything ahead of time so I could toss it all in, and not wait for chopping etc. I chopped my onion, garlic and fennel bulb.
Google search: "how to cut a fennel bulb" 
This fennel bulb looked totally foreign to me, I had no idea what to do with it. 
I have to say, google is a godsend. Chopping the fennel bulb was way easier then expected and very cool looking on the inside. Now like any curious mind, in my mouth went a raw piece of fennel. I figured it would taste kind of like a cabbage since thats what it reminded me of.... 
NOPE! THAT IS NOT CABBAGE! 
wow! what a unique flavour. It had the taste of black liquorice, in a vegetable form.. does that even make sense?  anyways...
Next up I grated my oranges for the zest and then squeezed the juice out with my new juicer.
Nothing fancy here, it was a 4.99 juicer from Target and it worked GREAT! 
Next I got my pot ready with some olive oil and in went the onion, garlic and fennel.
These smelled great while they began to warm up in the pan. 
After that, everything went pretty quickly. 
Into the pot went my canned tomatoes, broken by hand, as suggested by Chef Michael. I have yet to do this as gracefully as he does, I always look like I have suffered a gun shot from all the splashed tomato juice and seeds all over my shirt :) HAHA 
I also added in my orange zest & juice. Now I just had to taste of this concoction. Was it ever good! The tomato and oranges make this magic broth very unique and very flavourful! 
In went my spices, fennel seeds, coriander & saffron.
It always amazes me when a recipe calls for saffron and you only need a TINY bit.
If you have ever purchased this spice, you know how expensive it is, I am glad you only require a little bit to get so much flavour into your dish. 
Remember above how I said that fennel tasted like liquorice? well it was about to taste ALOT like it. 
If I could change something for next time, I would of used half or one quarter of the fennel seed. 
If liquorice is not for you, I think you could just eliminate it completely. 
Now I do like it, but I think for next time, I would cut it back a little bit. 
I let my broth simmer for a few minutes while I chopped up my fresh haddock and took my lobster meat from the fridge. 
I added in my haddock first and let it simmer while I cooked my scallops. 
-scary part of recipe part 2-
I have never cooked a scallop, so I quickly jumped online again and found my dear Martha Stewart at the top of my google search. 
I watched her video and got to it! 
I dried off my scallops, got my oil and non stick pan ready. 
Salted them top & bottom and in they went to be seared. 
To my surprise they turned out PERFECT! 
They were melt in your mouth good. 
I was SHOCKED! 

By the time these were cooked, my stew was complete. I threw in my lobster meat for an extra minute or 2 since it was already cooked and I didn't want it to be overcooked. 
I chopped some green onions to be ready for the "last min" like Chef Michael says. 
I served up my stew with my perfect scallop on top! 
I dug in and.... WOWZERS was this EVER TASTY! 
I have not had many mediterranean dishes, but this was just unlike anything I have ever tasted.
It was like you could taste every ingredient individually, but they came together in one bowl in perfect harmony. 
As I looked down at my complete dish, I could not believe that I cooked this, in MY kitchen.
I really pushed myself with this recipe and my labor paid off with this beautiful stew that tasted amazing! 
The final touch is a drizzle of Sambuca liquor on top.   
I could not believe that this entire stew was made in less then 30 mins! This is defiantly a weekday worthy dish, and I will be making this again.
One last thing I wanted to add was that you could get away very nicely just adding your favourite white fish and no extra seafood, or you could go all out and add all the seafood you like. This broth does wonders for really making that fish special. I really enjoyed this dish and I hope that you give it a try too! 


As always, my compliments to the Chef and cheers to you, my friends! 

I also wanted to send out a HUGE thank you to everyone that has been following my blog.
Your messages, tweets and emails are always great and I really enjoy reading them all! 


Sunday 16 February 2014

Recipe 9 & 10- Simple Roasted Chicken & House Mashed Potatoes

Recipe 9& 10- Simple Roasted Chicken & House mashed potatoes 


First off, I just wanted to start by saying how EASY this recipe is. When you open your roasting pan and dig into the cooked chicken, you would think you slaved all day in your kitchen. 
After using this recipe, I don't think I will make a roasted chicken any other way! 

So recipe 9 was chosen because I wanted something that wasn't too labour intensive. 
I had an accident while snowboarding 2 days prior and was trying to recover my neck and shoulder. 
This recipe was appealing, as all it is is assembling your ingredients in the roasting pan and letting it cook! 

To start off, I washed, chopped and placed my plum tomatoes and onions in my roasting pan. 
These tomatoes were very fresh and flavourful for not being in season. I was very impressed that I was able to find such nice tomatoes for this recipe! 
Essentially Chef Michael wants you to make a bed for your chicken to rest on. The flavour can then really work itself into the chicken while cooking, and trust me it REALLY does with this method! 
Next, I added some dry oregano and one head of garlic, each clove halved. 

Seriously, it took me forever to figure out what " one head of garlic, halved" meant... oh dear. 
HAHAHA
After everything was in my pan, I gave it all a nice sprinkle of salt & pepper. 
Next, I got out my fresh 5lb chicken. The recipe calls for a 3-4lb, but all I could get my hands on was 5lbs or larger.... I wish I would of went larger, since this chicken was devoured and I would of loved leftovers!
 I thoroughly washed and dried my chicken. One tip that I got from a Chef Michael TV episode, was to dry your chicken with paper towel after washing, this way the skin will crisp as its cooking. I made sure to salt and pepper my chicken well. 
Now, my roasting pan was a tight fit for this 5 pounder, but it worked even with my whole bed of tomatoes! 
Chef Michael suggests 20min per pound for roasting a chicken. 
Lets do some math.... 5x20= 100mins or.. 1hour 40 mins 
Into the oven she went! 
About 15 mins into cooking, this wonderful aroma of garlic tomatoes and oregano started coming from the oven. Oh my, was my mouth watering! I thought "this is going to be a LONG wait to dinner". 
My kitchen and house smelled amazing! 

About 20 mins before my chicken was going to be finished, I started on Recipe 10- House Mashed potatoes. 
I didn't think this recipe would require a whole post, because well.. who hasn't made mashed potatoes. 
Thats what I thought until I made THIS recipe! 
This recipe starts off with a whole lot of options depending on what your potato desire is when complementing your main dish. 
You can choose between "light and creamier texture" "Stronger and Assertive cheesy flavour" or " Distinctive aromatic character" 
WOW ALL THIS FOR MASHED POTATOES!? 

I searched through my fridge to see what I had on hand. I went with the "light and creamy" option.
I had some cream cheese and milk, so I figured that would be a nice complement with my tomatoes & Chicken later. 
Now for me, mashed potatoes are my ULTIMATE comfort food and in my opinion no one makes them better then my mom! 
She goes the traditional method of milk & butter. 
I have never added anything special to my potatoes over the years, so cream cheese was  a new addition, for me at least. 
I washed& chopped my Russet potatoes and got them boiling on my stove. 

And.. whats making mashed potatoes without completely boiling them over and making a mess on your stove? yep.. I did that too! 
Anyways, I chose to leave the skin on by recommendation of chef Michael. 
This is not something I would ever do, but I actually really enjoyed it! 
Now I hope I don't loose you here, but as my potatoes were cooking, my chicken was complete! Was I ever excited to reveal this yummy chicken that I had been smelling for 100 mins... 
Scratch & sniff here ^

This skin on top of  my chicken got a little stuck to the lid of the roasting pan during cooking, I told you it was a tight fit :) 
I am not going to lie.. I dug into that drumstick ASAP! 
The meat was so tender and juicy I couldn't resist waiting another minute! 
I swear that leg came with no chicken on it... 
Even little Emilie made her way to the kitchen to get her taste of the chicken.
Chef Michael suggests taking all the bones out of the chicken and leaving everything together in the pan, thats exactly what I did. 
Now my potatoes were complete and drained. I added in my small brick of cream cheese and then went to heat up my milk. Forget THAT! I have some wonderful already warm pan drippings from my chicken! I strained these out of the roasting pan and put them into a measuring cup. 
While mixing my potatoes I slowly added in some of the warm liquid! 
I even had some leftover drippings, I froze these for later use. 

So here we have it, Simple roasted chicken & house mashed potatoes on ONE plate! 
I garnished the whole thing with some fresh Oregano.
Seriously this was so delicious! The chicken was melt in your mouth and so full of flavour! 
If you love chicken, this recipe is FOR YOU! 
I added the tomatoes and garlic on the side and it just added that little extra to this dish.
And the potatoes.. how could I leave that out.. They were amazing!! 
The drippings gave it that familiar taste of gravy, while the tomatoes and garlic really came through that potatoey goodness. These were a winner for sure, and I can not wait to try the other options of mashed potatoes Chef Michael has shown in this book 
Just reliving this meal through photos, makes me want to make this again soon. This really was a great recipe and I encourage you to make this for your family. You will really enjoy everything that comes with this dish! 

As always, my compliments to the Chef and to you, my friends! 


Saturday 8 February 2014

Recipe 8- Bacon Wrapped Pork Tenderloin

Recipe 8- Bacon Wrapped Pork Tenderloin 

So recipe 8 was picked because I was trying to pick one of every section of the book.
(chicken, beef, fish etc)
It was a thursday night and I wanted something quick and yummy!
This fit the bill quite nicely.
This week my local "Dutchies Food Market" had pork tenderloin on sale at $2.99lb 
I wasn't really sure what one piece would cost, as this is the 
FIRST TIME I have ever cooked a cut of pork! 
I paid a whopping $2.73 for the piece of pork, what a bargain.
And for the record, I have cooked bacon.. but I don't know if that counts ;) 

I was a tad nervous as the last time I had pork, it was a pork chop and I think I was maybe 8-9 years old!  Pork has never really sat well after I have eaten it, so I have pretty much avoided it my entire life.
I was really hoping I wouldn't have a stomach ache after a BACON wrapped PORK TENDERLOIN! 
I was pleasantly surprised with this one... 

For this recipe, my ingredients were minimal. Mustard of choice, brown sugar, salt, pepper, herb of choice, pork and some bacon.

First I mixed up the 'rub' part of the recipe. 

Now Chef Michael says that you can use any mustard. Mustard is by far my favourite condiment in my fridge and I have a few varieties that I could of used, however I thought for the sake of being simple, I went with plain old yellow mustard. It was actually a really nice combo. 
I used rosemary as my herb of choice. Its been a really neat experience since starting this journey to have these types of herbs on hand. I literally only needed the meat for this recipe as my kitchen is becoming more equipped to make these recipes! 
Also, I have to say my chopping skills are really improving. 
One thing though since starting this whole book, I have had a chronic hand odour of onion and garlic.
Every recipe so far has included onion & garlic with the exception of the desserts.
No matter how many times I wash my hands, I curl up in bed at night and my hands are around my face and POW! Onions & garlic.
Thank you Chef Michael, I love me some oniony garlic fingers lol 
Anyways... back to the recipe! 
So next you are instructed to rub this concoction all over the tenderloin. 
I wasn't really sure how to take a pic of me doing this and every time I tried I had to laugh to myself thinking, " this looks horribly funny" 
But I will include one anyways so you can have a giggle too! 
So now that our pork tenderloin has been treated to a massage, you will have something that looks like this: 

Now as you can see in the background of this pic, I have a package of open spaghetti noodles.
But wait, I thought this was bacon wrapped pork tenderloin?
Don't fret my friends, here is where Chef Michael teaches you a magic trick! 
After wrapping the tenderloin in the beautiful thick cut bacon, you use the spaghetti noodles to secure the ends of the bacon to the pork! 
GENIUS I TELL YOU, GENIUS! 
And heres the best part, after cooking... the noodles just slide right out and you don't have burning skewers in your oven. 

What a beauty! and you can see the little noodle piece sticking out there securing my bacon strips. 
So this little baby will take a 20min trip to a 500 degree oven.
Now this step made me a tad nervous. I have never cooked ANYTHING in my oven at that temp. 

So in went my master piece and I waited the 20 mins... 
But wait.. whats the annoying familiar beeping sound at the 15 min mark..
OH RIGHT THE FIRE ALARM AGAIN! 
yes, once again my fire dept hates me. I set the darn thing off 4 times! 
What had happened, was some of the gooey brown sugar mixture leaked out on to my pan and burned. Well I took it out of the oven, changed the parchment paper and it went back in. 

At the 20min mark, my pork temp was at 125 degrees.
Its suggested to be cooked until the internal temp reads 146.
Another 10 mins and it was ready. 


I let the temp get a little higher then suggested, but I was busy wafting the smoke detector and opening my windows.. did I mention it was minus 30 here that day LOL 
Now when I took this out, it looked PERFECTLY cooked, however when I poked the meat with my finger it felt pretty soft still. I was expecting a very rare inside. 
But, rules are rules and if Chef Michael says to take it out.. out it comes! 
I was so excited when  I cut into the piece of meat.. perfection. 

I wish this picture was a 'scratch and sniff" 
This turned out better then I even expected. 
The meat was so tender and the bacon was perfectly crisped. 
The only thing I would change for next time.... MAKE MORE! 
My kids and husband absolutely loved this dish and already requested it for another night. 
And to my surprise, I didn't suffer any indigestion later :) 
I am so glad that this recipe was in the book and gave me a second look at making pork.
I paired this recipe with Recipe 7- Penne with Spinach pesto. 
It was TERRIFIC! 


As always my compliments to the chef and cheers to you, my friends! 
See you all next week for recipe 8&9

Below is a link to the recipe & instructions from Chef Michael Smiths website
http://www.foodnetwork.ca/recipe/bacon-roast-pork-tenderloin/12886/


Recipe 7- Penne with Baby Spinach Pesto

Recipe 7- Penne with Baby Spinach Pesto 

Good Morning to All! 
I am starting off my saturday morning blogging and drinking coffee. I apologize for my delay in posting my last 2 recipes. We have had some medical appointments for our youngest daughter Emilie and my mind has been elsewhere. 
I have to say though, taking on this challenge has given me a breath of fresh air. It has been such a stress reliever to get into my kitchen and just COOK! 
That is the main reason I took on this personal challenge. 
I think everyone needs a little "getaway" from everyday life and I find that through cooking and being in my Kitchen, so I dearly thank Chef Michael Smith everyday for being my guide in the kitchen and helping me through some difficult times. 
I encourage everyone to find that 'one' thing for yourself.. whether its cooking or a hobby! 

So to start off this recipe, I have to say that this may be the FIRST RE-DO! 
As you will see in the pics, it turned out edible.. but I am convinced that I messed this one up haha! 

I shopped for my ingredients like usual and had a good laugh at my bulk food store when I purchased the pine nuts for this recipe. The girl at the register ACTUALLY asked me " do you still want these?" I looked over at the computer screen.... and: 

jkhdfjashfdg;basfjkgn;fhgsa !?! 
FOR PINE NUTS!?!? 
keep in mind that I only needed  1 cup of pine nuts, and this was the PRICE! 
I laughed it off and gathered my sack of 'gold nuggets" and headed home. 
I later told my husband how much these little babies were.. AFTER we ate the pasta LOL! 

For this recipe, I gathered some olive oil, pine nuts, salt, parmesan cheese, fresh spinach and some Penne pasta. For the pasta, I was intrigued that Jaime Oliver had his own line in Sobeys and decided why not have 2 Chefs inspiration in my kitchen today?

To start off, I washed my spinach in my fancy salad spinner. If you don't have one of these, GET ONE! I have been using it to spin ALL of the produce I wash... and its totally fun too! 

Seriously, I can not believe how GREEN this spinach was. I did nothing to enhance these photos, so keep that in mind when you see how crazy green my pesto turned out. 

Next I pulled out my blender and put in all my ingredients. 
And at this point, is where I think my re-do may come in. Chef Michael says to use a food processor, which I do not have. I thought, well my blender should work! WRONG.. 
it doesn't work and in the end I think it lead to in my opinion, the failure of my recipe. 
So to start off, in went oil, pine nuts, garlic and some salt. 
BLEND. 

 Ok, this looks alright.. next went in the cheese...

Looking good.... next up the spinach... now here is where the trouble began. 
How on earth do you get the spinach to chop up nicely in a blender? 
Ya... I didn't think that through at the beginning.. till NOW! 

As you can see, it did puree eventually.. after sticking a wooden spoon in and jamming the spinach down towards the blade. DONT TRY THIS AT HOME KIDS
No only did we get pine nuts.. we got some "pine shavings" lol 
This is the result of my spoon in my blender. 

So what did  I learn? When Chef Michael says use a food processor, it doesn't mean a blender. Guess what my next kitchen purchase will be? 
THAT.. and another spoon! haha :) 
So after all of that, I was left with some radioactive looking paste. I have a feeling that it was not suppose to be this consistency. I think I over over blended it in my attempt at jamming down all of the spinach. 
Next up, Jaime Oliver showed up and we made some pasta. 
Just kidding, I wish! 
But seriously this pasta was fantastic! and hey, that packaging went with the theme of my recipe! 

After 11 mins, we had some wonderful hot pasta! Chef Michael instructs you to leave about a 1/2 cup of the starchy pasta water in the pot. You then mix in your pesto and the hot water helps make everything mix nicely. 

So I have to say, even though I thought the consistency was a little 'off' on this one, 
it tasted AMAZING! It was so fresh and full of flavour! 
The flavours of the fresh spinach, pine nuts, parmesan and garlic really came through and worked very well together. 
We all had seconds on this one! 

This pesto was very creamy and really coated the pasta well.
I will FOR SURE, be taking another swing at this one to see if a food processor makes the consistency a little better. 
This recipe had to be one of the quickest for prep time. As fast as you can boil a pot of pasta, you can have the fresh pesto ready for your cooked noodles. 
Simple and easy! Perfect for the crazy week nights when you just want something quick! 

Hope you all are having a wonderful saturday morning! 
As always, my compliments to BOTH chefs today and cheers to you, my friends! 

You can now follow me on Facebook as well! 

https://www.facebook.com/100recipesin52